Web Booking Overview
Note
This video relates to both the TM2 and TM3 versions of the desktop software.
Note
This article will only work for setting up the following URL http://www.tm2online.co.uk/<yourbusinessname>
If you are a Hosted customer of ours, The Web Booking add-on section allows a user to set up and manage their TM2 online bookings webpage.
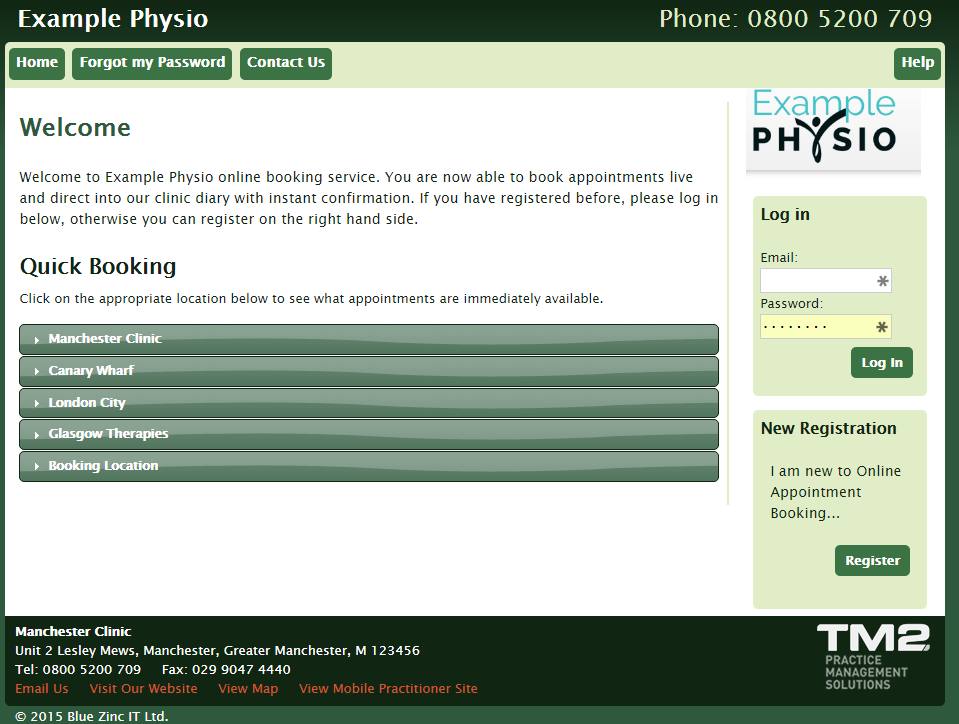
From this webpage, patients can book available appointments and classes directly into your TM2 diary. They can log in if they have an online account already set up or register a new account and book an appointment making them a provisional patient.
Practitioners are also able to log in a view their diary for the day either on a PC/laptop or a mobile device.
When making any changes to your Web Bookings page you must click the Save button in the top right corner.
The first tab of the Web Booking section is the Status tab.
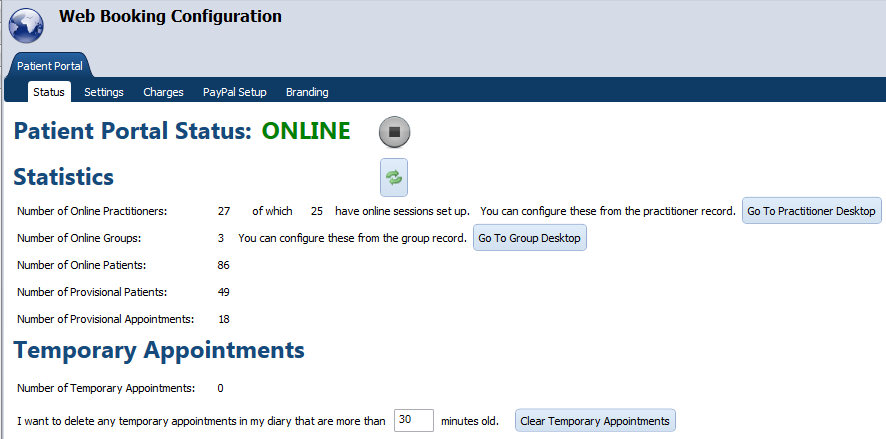
This page is an overview of your TM2 online. It will show the number of online practitioners, patients, groups, provisional patients and how many provisional appointments need to be actioned.
Stop Button - this will deactivate your online bookings page setting it to offline. Click the Play Button to activate it again.

Refresh Button - this button will refresh all online statistics.
Go To Practitioner Desktop - this will bring you to the Practitioner tab in main.
Go To Group Desktop - this will bring you to the Group tab in main.
What is a Temporary Appointment?
A temporary appointment is created in TM2 when an appointment time is first chosen using the online pages. When the booking is confirmed via the online pages, the status is changed from temporary to standard. This is to stop any double bookings between practice appointments and online appointments. If the user closes the webpage before the booking is confirmed, then the temporary appointment will be held. These temporary appointments need to be cleared at regular intervals.
You can clear these appointments by clicking Clear Temporary Appointments or allow TM2 to do it for you every 30 minutes.
The second tab for the Web Bookings is the Settings tab.

In this tab, you can enter your business name that will appear on the header of the online bookings page. The checkboxes allow you to set up your online bookings page in different ways.
Allow all TM2 users to create new online users - this will allow all your users within TM2 to create online user accounts for patients, practitioners, groups etc.
Allow patients to register for your clinic online - if this is unchecked patients will not be allowed to register online.
Allow SMS Texting - if this checkbox is ticked, SMS messages will be sent to the patient confirming their appointment.
Allow patients to search for online appointments using a specific time - this will allow patients to search for an appointment at a time that suits them.
Allow patients to book into classes online - this will allow patients to book into your classes online (remember the class has to be set up to allow online bookings).
Give patients the option to add authorisation codes, policy numbers etc - this will allow patients to add their authorisation codes and policy numbers online during the booking.
URL for TM2 Online - you need to enter your online URL in here - www.tm2online.co.uk/
Max. Online Bookings Allowed Per Patient - this will limit the amount of online appointments patients can book.
The third tab for the Web Bookings is the Charges tab.

If you want patients to pay a Deposit or Full Payment check the appropriate options (you must have PayPal set up for this to work).
The fourth tab for the Web Bookings is the PayPal Setup tab.
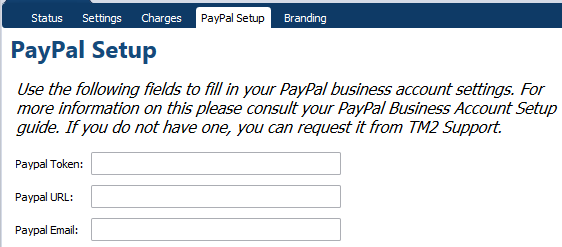
Once you have set up your PayPal business account will need to fill out the following fields for your charges to work.
Paypal Token - enter the token code provided by PayPal, for example, VYYLDAV4...
Paypal URL - enter the URL provided by PayPal.
Paypal Email - enter your PayPal email linked to the business account.
The fifth and final tab for the Web Bookings is the Branding tab.
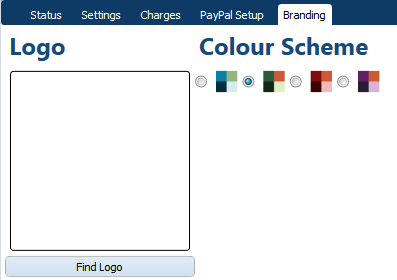
In this tab, you can add a company logo by clicking Find Logo and edit the color scheme for your web booking page. These color schemes cannot be changed.