Creating a Class Register
Note
This article relates to both the TM2 and TM3 versions of the desktop software.
Running a 'Class' at your clinic can have multiple scenarios.
A scenario could be:
- Using the class system only for registration purposes, which would result in not billing the patient.
- You have created 'Multiple Stock-items' in TM2 and you wish to use the 'pre-paid billing items' within a patients account as a means of paying for the 'Class'.
The below process will explain how to do both of these:
To Create a Class click on Practice > Classes or File > New > Class
Enter in the Class Name and Description

Click Next
Select the Location and Venue
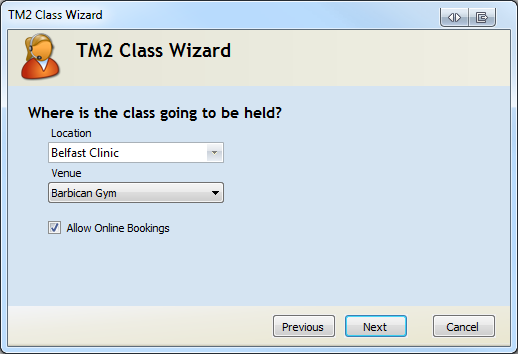
Click Next
Select the Practitioner you wish to associate with the Class

Click Next
Enter the Start date of the 1st class. Then select the whether this is a single class or a class with multiple sessions.
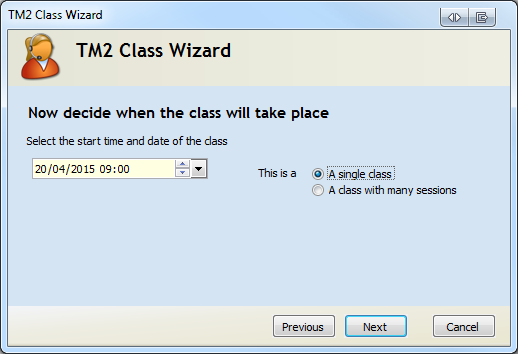
Click Next
It is at this point that you can create a class by selecting a stock item, however in this case we want to create a 'pre-paid charge'.
Select "New Stock Item"
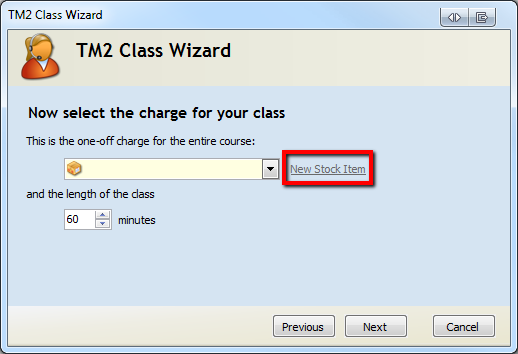
The Stock Items Details window will appear and allow you to create a new stock item, make sure that you have input a Description such as Pre-Paid Class, 0 cost and selected the consultancy category along with the time the class is due to last. Once complete click [CREATE]

TM2 will want you to confirm that you wish to create a stock with £0 cost. Click [Yes]

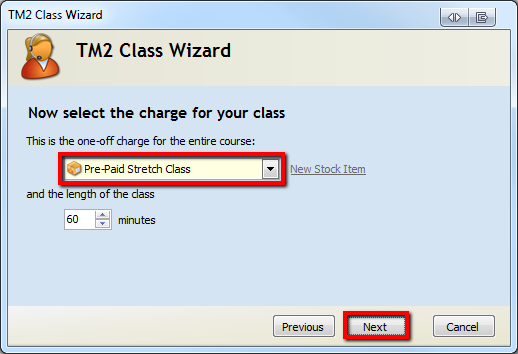
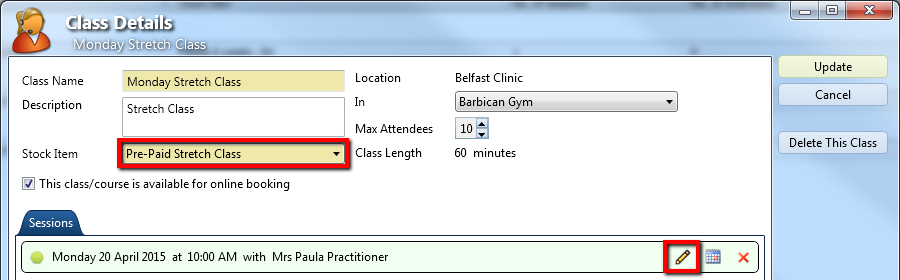
You will see that your stock item is now selected, if the time of the class needs to be overwritten then you can change the length below.
Click [Next]
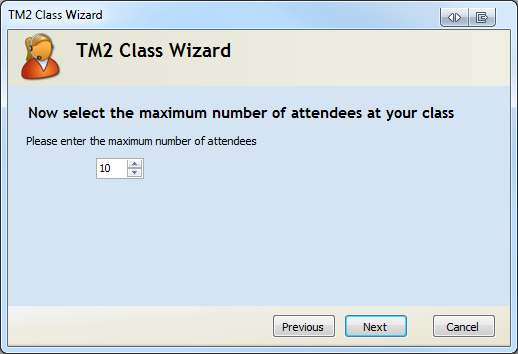
Select the maximum number of attendees that can attend your class and click [NEXT]
The Class has been created.
Click [Finish] (The class manager will then open provided "Open class manager when finished" has been ticked.

Adding Attendees
There are two scenarios - adding an attendee who has pre-paid billing items in their account and adding an attendee who is 'PayAsYouGo'
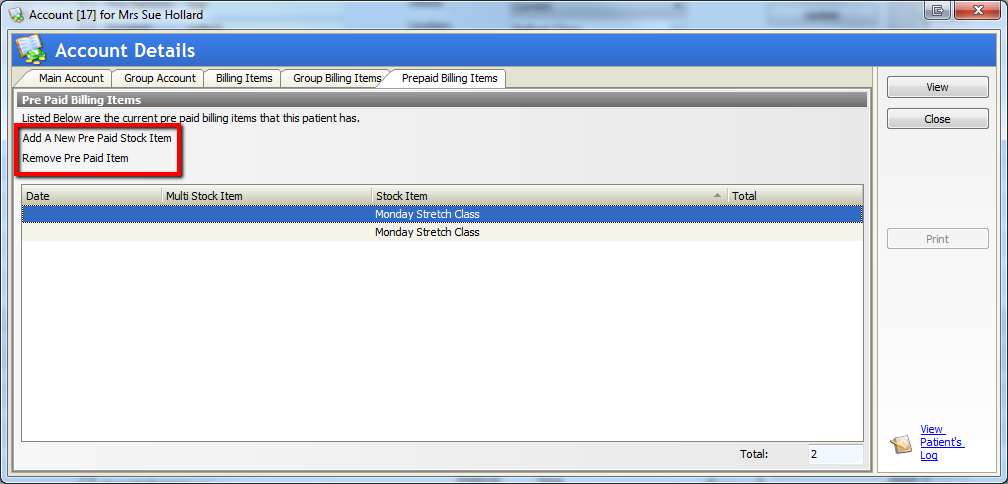
Pre-Paid Attendee
With the current charge 'Pre-Paid Stretch Class' selected, click the 'Add/ Mark Attendance' icon.
The 'Class Register' will appear and allow you to add an attendee, click [Add Attendee]

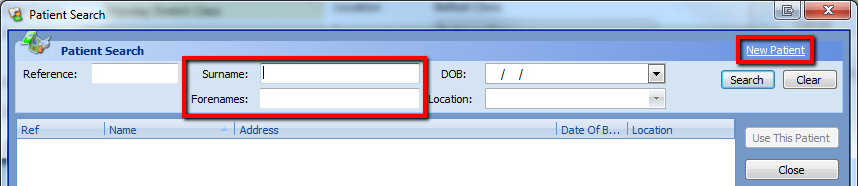
Search and select your patient or alternatively click [New Patient]
The Quick Billing window will appear,
Click [Do Not Bill]
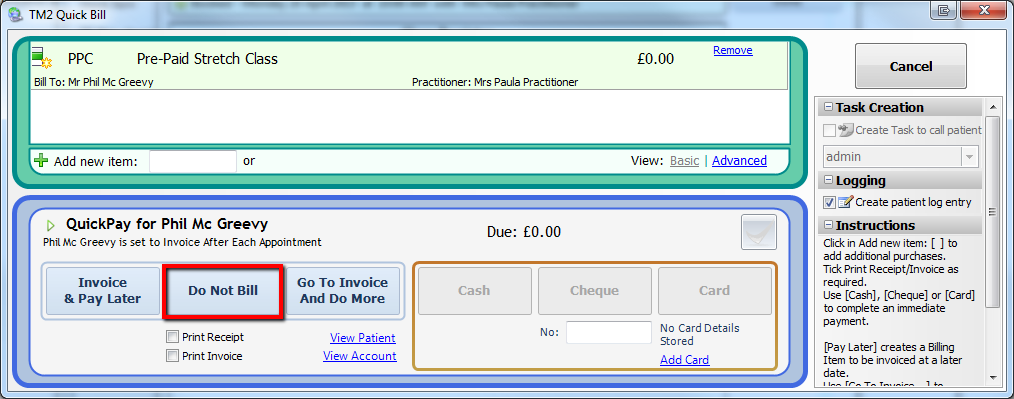
This will complete the registration. You will now go to the patient account and remove one of the 'Pre-paid billing-items'
PayAsYouGo Attendee
In this scenario, before you add the attendee you will need to change the charge of the 'Class' from the 'pre-paid item £0' to another individual charge such as:

This will now appear in the drop-down

Upon selection TM2 will advise the following:
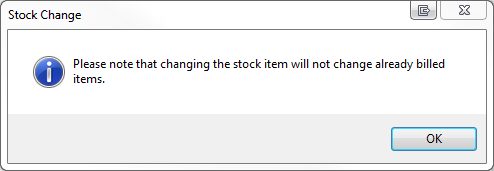
Click [Ok]
You will now click on the 'View/ Mark Attendance' icon and continue to add your attendee who is paying as they go.

Once added the familiar Quick Bill window will appear and allow you to take payment.