Diary Overview
Note
This article relates to both the TM2 and TM3 versions of the desktop software
In the Diary section of TM2/TM3 the majority of options are available on the Diary Toolbar. From here users can select different clinics, practitioners and change the view of the diary to be day, week or month plus some more features.

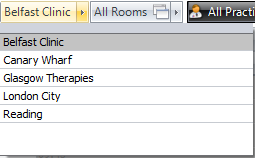
When a user selects the Clinic dropdown box a list of clinics will appear. If TM2/TM3 has only been set up with one clinic; only one will show in this dropdown. Selecting a different clinic will show new information for different selections e.g. what practitioners work at that clinic. To select a different clinic simply click on a new clinic.
When a user selects the Rooms dropdown box a list of rooms for the selected clinic will appear. If there are no rooms set up there will be no rooms in this dropdown. Rooms are added when setting up TM2/TM3. To select a room make sure the corresponding box beside it is ticked and click Apply. This will change the diary view from the default view of practitioner; to Room view. To return the Diary to it's original state select Practitioner and select the Apply button. The All button on the Room dropdown will select all rooms. The Clear button will remove all selections in the dropdown. The Apply button will apply any changes made by the user.
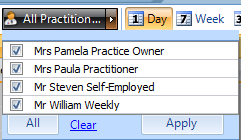
From the image below, the All Practitioner box is in black and the All Rooms box is clear. Black signifies that this is what view the Diary will show i.e. what selection is active at that time.

When a user selects the Practitioner dropdown box the practitioner list will appear. The practitioners shown will be for the selected clinic. The same rules apply for selecting a practitioner as selecting a room. To select a practitioner follow the same steps as above.
The next section of the Diary Toolbar is the Day, Week and Month view. These selections will dramatically change the view of the Diary. As default; the Day selection is picked. To choose a different view, simply click on the appropriate selection.

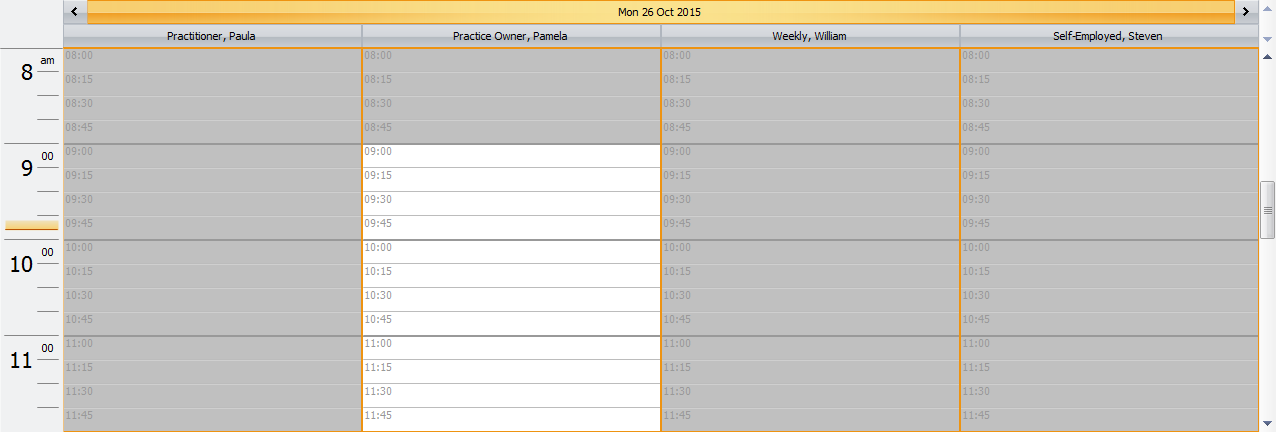
The Day view is shown below. It is an easy way to view multiple practitioner's diaries at the same time.
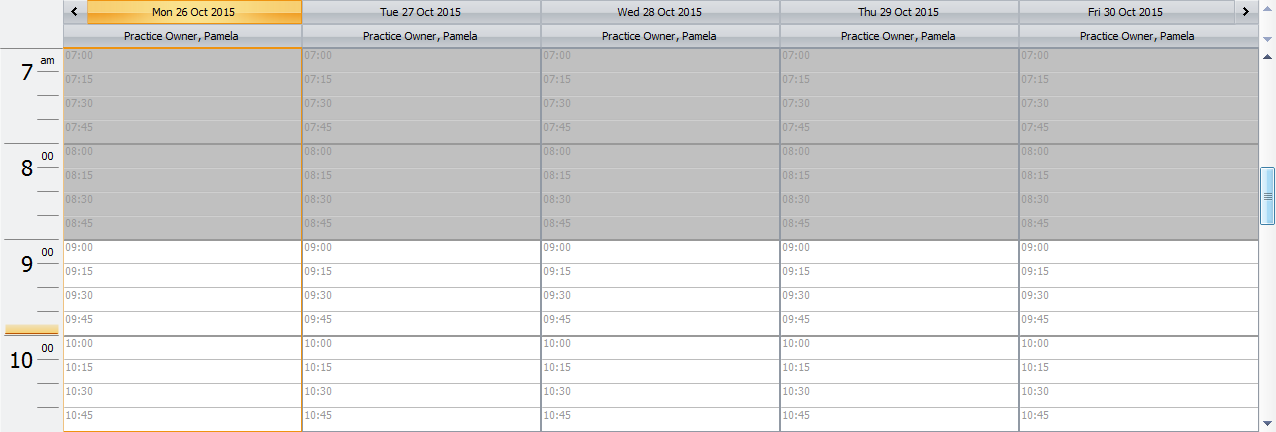
The Week view is shown below for one practitioner. This view can be very messy when trying to view multiple practitioners at once but it is useful when only one practitioner is selected.
The Monthly view is shown below. Only one practitioner can be selected at any one time on this view. Users can select what practitioner they want with the dropdown menu, this is highlighted in the screenshot below.

The Today button will return a user to today's date in the TM2/TM3 Diary.

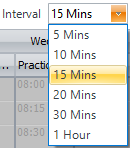
The Interval dropdown box will show what time interval view the TM2/TM3 Diary is currently set at. If a clinic works in 45 minute session intervals, it is probably best to use the 15 minute interval. The Interval selection is down to personal preference of each user.
The Privacy button is useful for hiding patient information. This is in case a user is booking another appointment on a tablet in view of another patient. When privacy is selected the button will be highlighted in orange.

The appointment will be shown like below in the Diary. Appointment will be shown instead of the patient name.

The Appointment Finder button is a quick way to view available appointments for different practitioners. When this button is clicked the following window appears.

From here many different options are available. If there were many practitioners in the clinic users can search for a specific practitioner by typing their name in the Filter Practitioners box. As default all practitioners are shown and their next available booking date and time are shown. Users can either go to their diary and book an appointment from there or click the Book Now button.
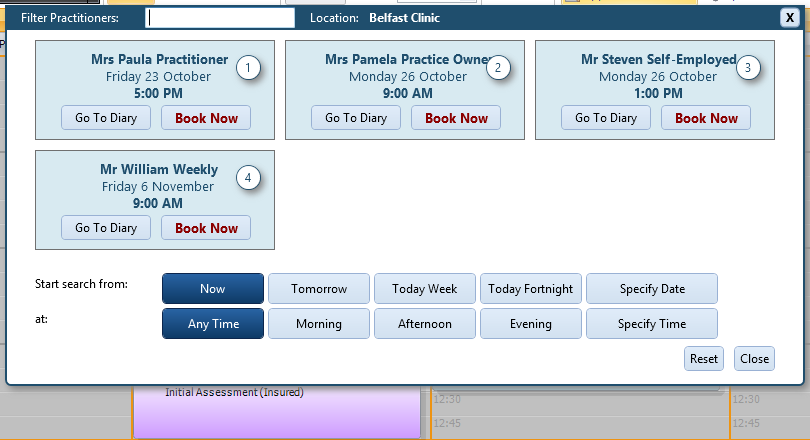
The search buttons at the bottom of this screen are useful for checking appointments in the future. These can be chosen by clicking the buttons or by specifying a date and time. When the Today Week button is clicked it will change the dates on the practitioner availability and work out when the next available appointment is on that date.
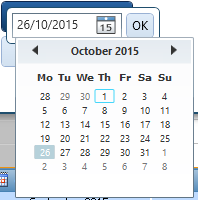
Users can select a specific date if the pre-selected dates don't fall into a timeframe that is suitable. The following box appears when Specify Date is clicked. Users can then select a date from the calendar. The arrows are used to move between months. If the month is clicked TM2/TM3 will change the view from just one month to a whole year view. When a suitable date is selected users can click the OK button to confirm the date.
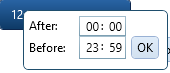
Users can select a specific time range to book the appointment from. The following box appears when Specify Time is clicked. Users then choose a time range that suits a particular appointment. Ths selection method uses the 24 hour clock so it must be entered in the same format. When a suitable time is selected click the OK button to confirm the time.
The last selection on the Diary Toolbar is the Options selection. From here the user can customise the view of the diary among other things.

When the Options button is clicked the first thing a user will see is the Colours section. From here users can edit the default colour scheme of TM2/TM3. If the Apply Colours to all users tick box is ticked this colour scheme will be applied to all user accounts if this has been set up by the admin user. The Reset my TM2 button will return the colour scheme to the default colour scheme.
Note
In the TM3 branded desktop version this is exactly the same process, Reset my TM3

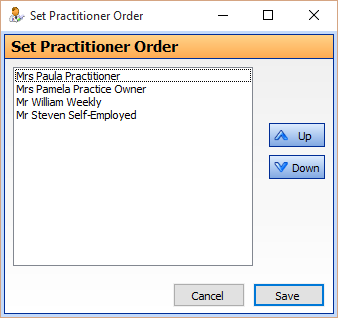
When the Reorder Practitioners button is clicked the following pop up will appear. This allows users to edit the position of practitioners on the diary. To reorder practitioners users can click on the practitioner they want to move and use the up or down buttons to put them in the correct order.
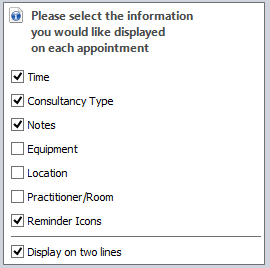
The next section of the Diary Options menu allows users to edit the information shown on the appointments in the Diary. This is as simple as ticking the correct box to allow that piece of information to be added to the appointment.
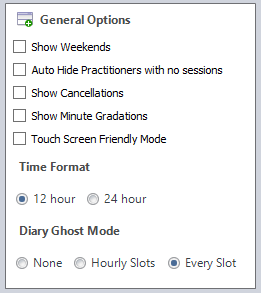
The last part in the Diary Options menu are simple selections also. Users can tick these boxes to allow the corresponding information to be shown/not shown in the Diary. The time format can also be changed here by selecting the correct option.
To navigate to different dates on the Diary users can use the calendar at the bottom of the screen or use the arrows beside the date to go to the next day/week/month depending on the set up of the diary.

To book an appointment in the Diary select a time slot and double click on it to open the Diary Event pop up and then select an appropriate patient. The following pop up will appear, there are many different options from this pop-up. On the right-hand side, there are some selections that are currently not available. This is because the appointment is not booked yet; whenever it is created these will become available.
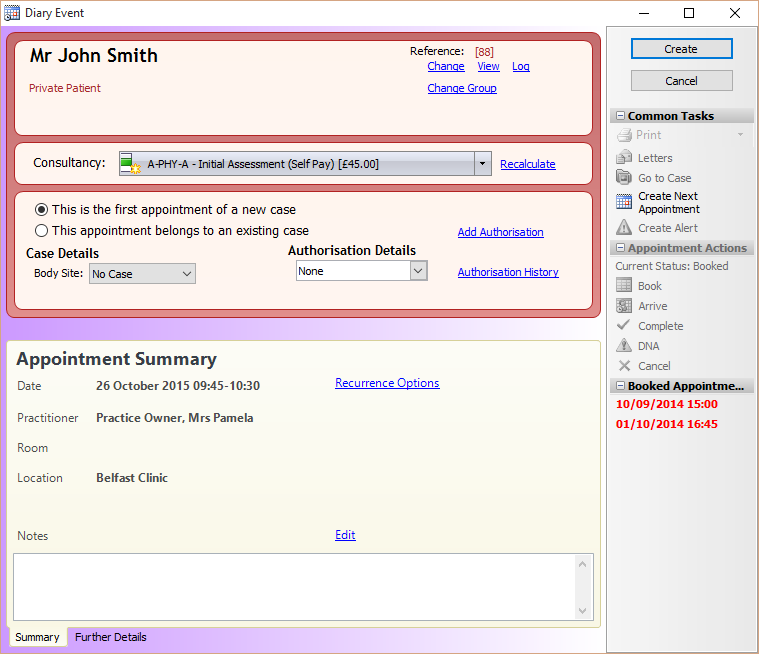
The first part of the Diary Event window contains patient information and how to view this in more detail etc. There are four buttons in this section: Change, View, Log and Change Group. When clicked, the Change button will allow users change the patient the booking is for. When clicked, the View button will bring up the patient account This is a more in depth view of the patient account including such things as their address and previous history. The patient account has been explained in previous sections of the Knowledge Base (link). When clicked, the Log button will bring up the patient log where information can be viewed from previous cases or new information can be added from here. When clicked, the Change Group button allows users to change the group of the patient from a private patient to a member of an insurance group such as BUPA. This will appear as a dropdown box to the left of this section of the Diary Event window.

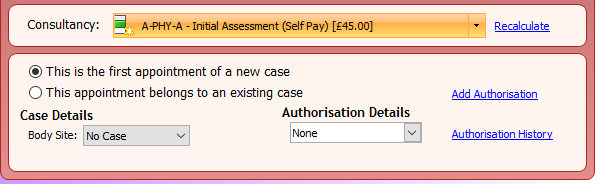
The next part of the Diary Event window includes options of what sort of assessment the patient is getting, choosing if it is a new or existing case and the authorisation details for their insurance. To choose the type of assessment click on the Consultancy drop down box and select the appropriate assessment. If this is an Initial Assessment users may want to give more detail and show what sort of problems the patient is having by adding Case Details. This can be done by clicking on the case dropdown and selecting an appropriate case. Users have the option of adding this appointment onto an existing case. When the This appointment belongs to an existing case button is clicked; users can then go to the case dropdown and add this appointment to an existing case.
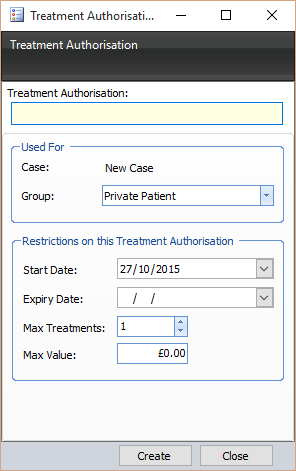
Authorisation details are added for patients who are part of an insurance group. When the Add Authorisation button is clicked the following pop up appears. Users then fill in the appropriate information regarding their authorisation. This will register to the patient's bookings and count down to the end of their free treatments. Clicking the Authorisation History button will take users to the patient record and show their authorisation history.
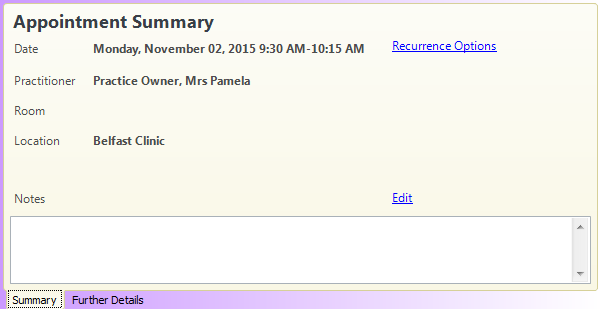
The bottom section of the Diary Event window shows some information of the appointment and users can add more information from this section e.g. notes on the patient. The notes can be anything from a reminder of what the patient looks like or medical details about the patient e.g. if they are blind. The Recurrence Options and the Edit buttons take users to the Further Details tab.
The Further Details tab allow users to edit the appointment information in more detail. The type of slot being booked can be changed here; these slots are Appointment, Holiday, Meeting or Other. The Start and End time/date can be edited here. If the appointment is scheduled to usually last 45 minutes but in this instance the user knows it will take longer due to the patient's circumstances the time can be extended here. Clicking on this arrow

will open a calendar where users can select a larger date range, this would be useful for booking a holiday slot. The Room the appointment will take place in can be chosen here. The Practitioner can be changed from the corresponding dropdown box. If the appointment will Take Place in a particular area and if any Equipment such as an ultrasound is needed, the correct options are selected from the dropdown box. The Recurrence can be selected from here also and if it occurs Daily, Weekly, Monthly or Yearly. The number of occurrences can be selected in this box also.

When all selections are correct users can click the Create button to book the appointment.
Now that an appointment is created the selections on the right-hand side of the Diary Event will become active. The Print option will allow users to print patient details.
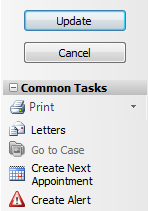
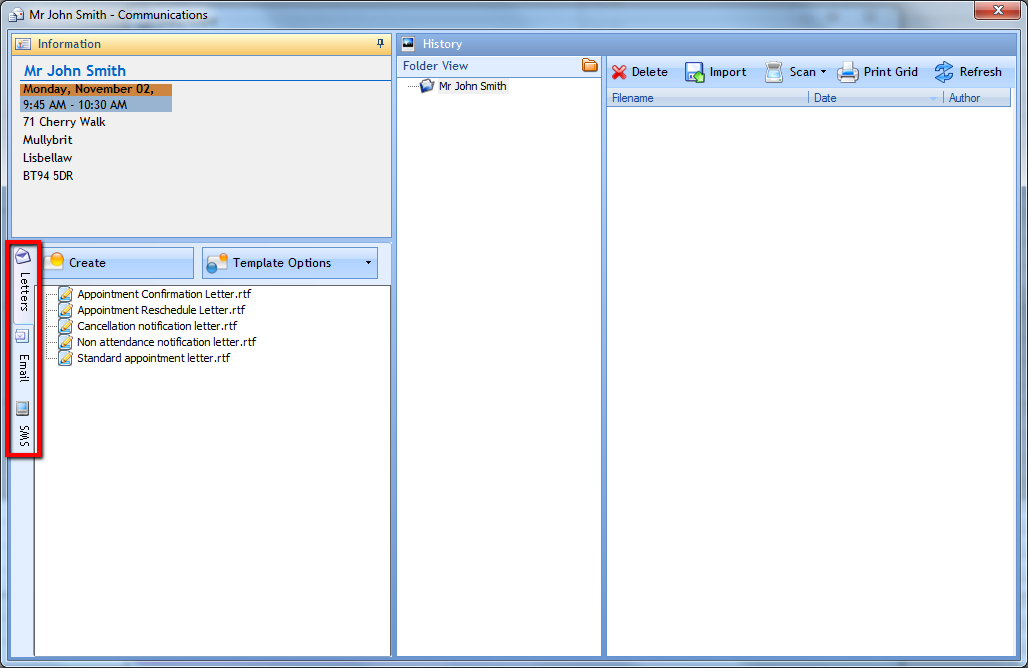
The Letters button will open a pop up window where users can choose to send some sort of communication to patients. The communication methods can be selected from the left-hand side, highlighted in red. Users have the option of creating a new Letter, Email or SMS (Text Message) or selecting one of the TM2/TM3 templates. Letters are explained in more detail in a different section of the knowledge base. A useful start on creating letter templates can be found here.
Clicking the Creating next appointment will add the patient's name to the end of your mouse. From here navigate to the date in the diary you wish to book and click the slot. To remove the new appointment from your mouse press the escape button (Esc).
Clicking the Create alert button will allow you to create a new alert on the patient account. The steps to do do this can be viewed here.
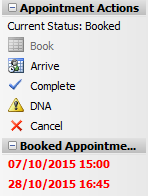
The Appointment Actions section will update the status of that appointment dependent on what choice is made. The status can be updated by the use of Hot Keys in TM2/TM3, they are shown here.
Under Booked Appointments the patients previous bookings that have not been set as complete i.e. not paid for, are shown in red.
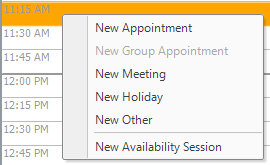
The Diary has right click options available. When anywhere in the diary (apart from on an appointment) is clicked the following pop up appears. This is another way of setting up a new (Group) Appointment, Meeting, Holiday or Other. A New Availability Session can be set up here. This is when a practitioner is available out of hours.
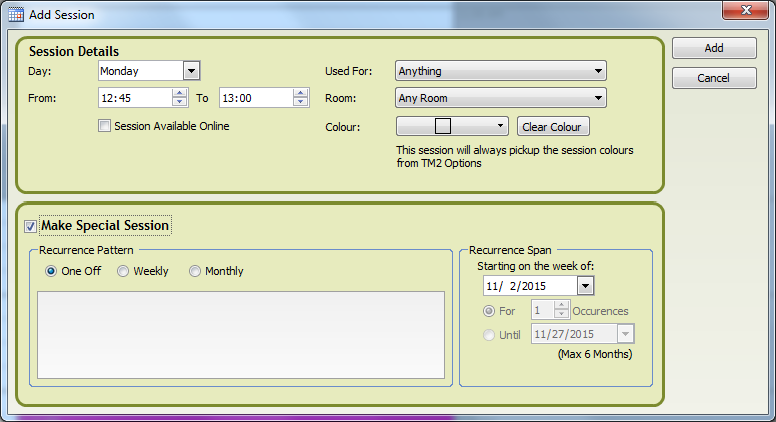
The New Availability Session window appears when clicked. From here a particular day of that week that is selected can be chosen along with a time slot. Users can then select if the session is being used for a specific purpose and what room it is in. Colour schemes are selected here. If this session will be recurring then the Make Special Session button must be selected. It will expand the Add Session box to bring up to recurrence options. These options can be edited to suit the needs of the session. The Weekly and Monthly buttons will bring different options in the white space below them.
When you right click on an appointment the following menu appears. When the Edit button is clicked the Diary Event window will appear which allows you to edit the patient appointment details.
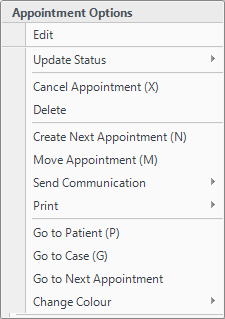
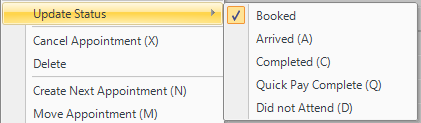
When the Update Status option is clicked a sub menu will appear to the right of the Appointment Options menu. This allows you to change the status of the appointment by selecting the correct option. The status can be changed, as stated above, by the Hot Keys. An appointment is canceled when the Cancel Appointment option is clicked; notice the Hot Key shortcut is shown in brackets beside some of these options. The difference between cancelling and deleting an appointment is that when something is canceled; it will be recorded in the patient record. If something is deleted there will be no record of the appointment at all.
Clicking the Create Next Appointment option will allow you to add another appointment for that particular patient. The Move Appointment button is self-explanatory.
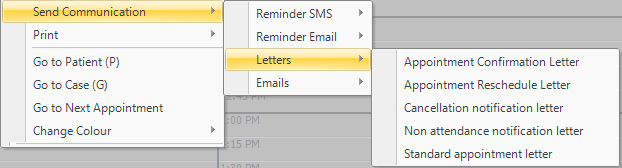
The Send Communication option has a few sub menus. The Reminder SMS & Email options have the same options available; the difference being one will send an SMS and the other will send an Email. Patients must have a mobile phone number/email address registered with TM2/TM3, for these reminders to be sent out. Users should choose the correct option depending on what they want to do.

The Letters section gives many different options. When the correct option is selected, a letter template will appear where the user can add more detail if they wish.
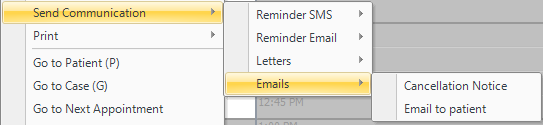
The Email section gives some different options also. The same rules apply whenever an option for email is selected. If a customer does not have an email address an email cannot be sent.
The Print section allows users to print details about the appointment or a summary of the selected appointment.

The Go To Patient option takes user to the patient record.
The Go To Case option takes users to the appointment case.
The Go to Next Appointment option takes users to the next appointment in that particular case.
The Change Colour option allows users to change the colour of the appointment.
