Creating a Group/Business
Note
This article relates to both the TM2 and TM3 versions of the desktop software
Within this guide, it will show you how to create a group within TM2 including the following;
- Group Details
- Group Location
- Group Stock Item
- Group Invoice Details
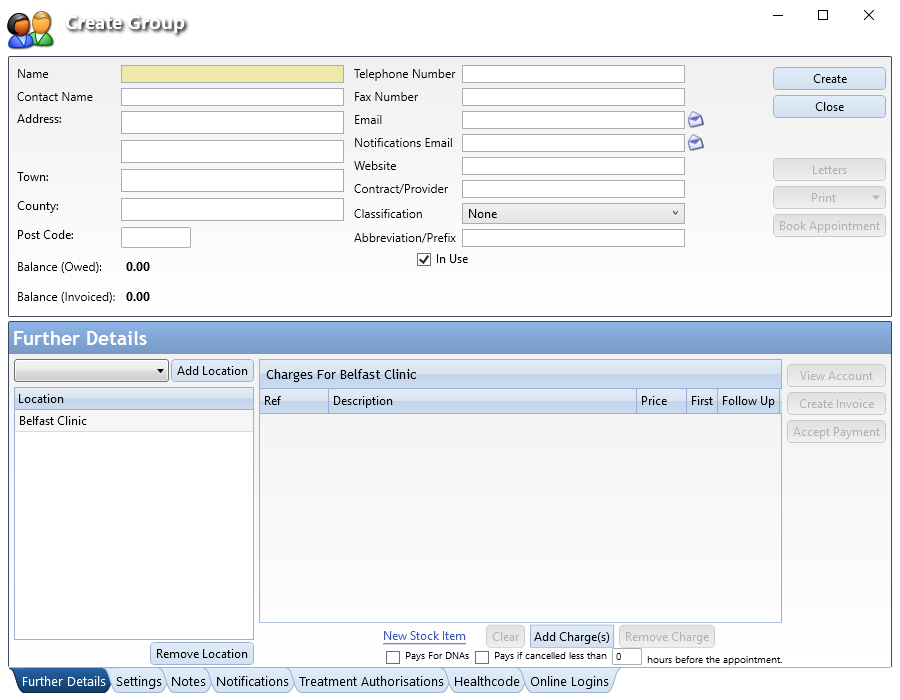
Group Details
You will need to create a new group and add some mandatory details before proceeding. To do this
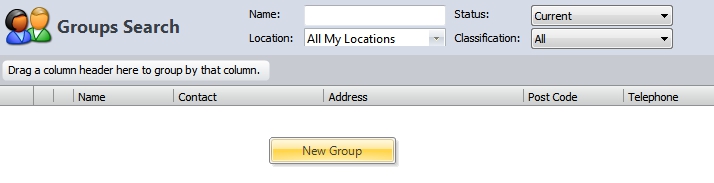
- Click on Main - Groups
-
Right-click on the group screen - Create New Group (Like the image below)
-
Enter a Group Name
-
You may also enter additional details such as the main contact, address and contact details or whatever you need to have on record and then click on 'Create'
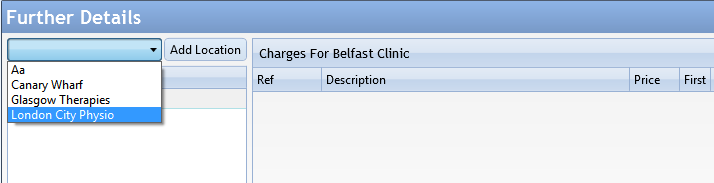
Group Location
You will need to add locations that the group will be active from. To do this
- Within Further Details - Open the Location Dropdown
- Select a Location
- Press Add Location
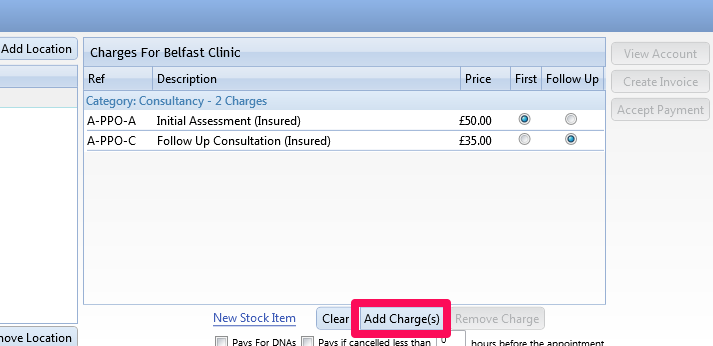
Group Stock Items
Now that the location has been added, you will need to set charges for the group at this location. To do this
- Click on Add Charge(s)
- Select a Charge
- Press Add
If you have not made the charges for this location yet
- Click New Stock Item (Just to the left of 'Add Charge(s) )
- Enter Stock Details
- Press Create
- Press Add Charge(s)
- Search for the Charge created
- Press Add
Once you have multiple charges added, you will need to choose whether they are First or Follow Up charges. To do this
- Click on either the First or Follow Up at the right of the charge
- Do this for all charges
- Press Update
You will have the option to check Pays for DNAs or Pays if canceled 'x' days before. This will allow you to set Did Not Arrive and Cancellation charges for the group.
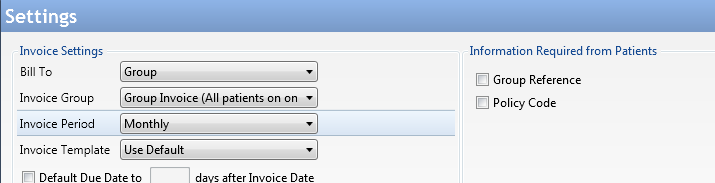
Group Invoice Details
You will now need to select the Invoice Settings for the Group. To do this
- Click on the Settings tab at the bottom of the Group Details window
- Click on the Bill To drop down menu - select Group or Patient
- Click on the Invoice Group drop-down menu
- Group Invoice applies multiple patients to the Invoice
- Individual Invoice applies all billing items per patient to a single Invoice
- One Invoice per appointment creates a new Invoice for every appointment
- Click on the Invoice Period drop-down menu
- Monthly allows the Invoice Wizard to run batches on a Monthly basis
- The Invoice is created after each appointment
- Invoice Outstanding will allow the Invoice Wizard to pick up any outstanding Invoices for the Group
- Manual allows you to Invoice the group at your own discretion
- Click on the Invoice Template drop down
- Use Default uses your default Invoice template
- Any custom Invoices will also appear within here