Prepayment Methods
Note
This article relates to both the TM2 and TM3 versions of the desktop software
There are two types of prepaid methods;
- Basic Prepaid Payment
- Advanced Prepaid Payment - Using Treatment Authorisation
This guide will show you how to use different types of prepaid methods.
Basic Prepaid Payment
There are two types of basic prepaid methods.
First Method
- You complete a patient’s appointment and are redirected to the ‘TM2 Quick Bill’ screen.
- The patient wants to pre-pay their follow-up appointment
-
Add in the additional payment manually
-
Choose the appropriate payment method
- When the patient comes in for their next appointment book it as normal
-
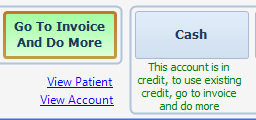
When you complete the patient’s appointment and are redirected to the ‘TM2 Quick Bill’ window, TM2 will notify you that the patient's account is in credit.
-
Select ‘Go To Invoice And Do More’
-
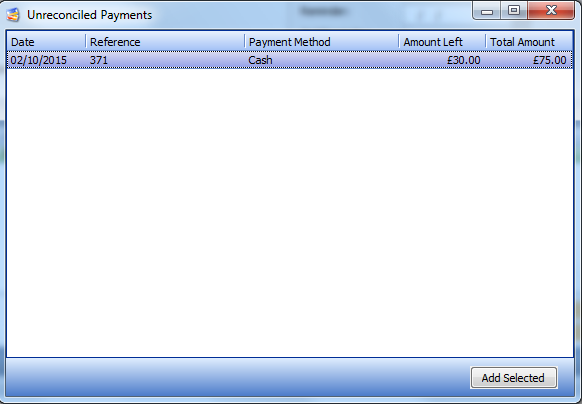
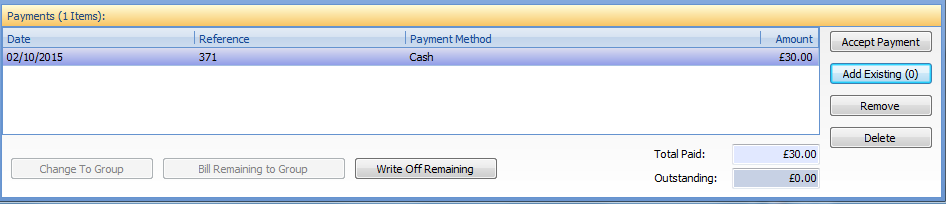
Select ‘Add Existing (1)’ in the payments section in the invoice window.

-
TM2 will show you the amount left off the original payment. Add the selected payment to the invoice.
-
The payment will be added to the invoice
-
Update the invoice and the payment process is finished.
Second Method
- You book a patient's appointment but they wish to pre-pay all treatments in advance
-
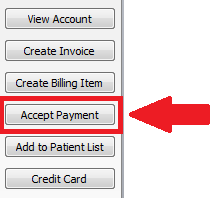
Go to the patient's record and click ‘Accept Payment’
-
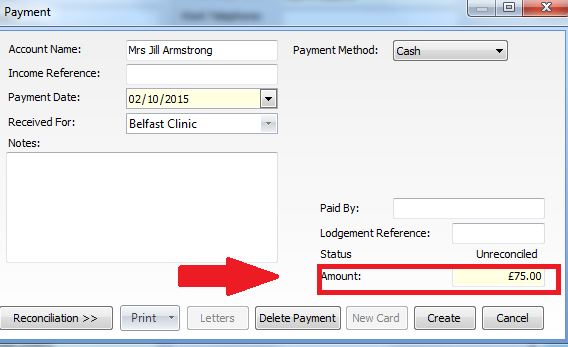
Select the type of payment (cash, card, bank transfer etc)
-
Manually type in the amount the patient wishes to pre-pay
-
Click ‘Create’ to accept the payment onto the patient’s account
-
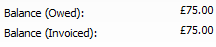
The patient's account will be in credit
-
When you complete the patient’s next appointment TM2 will notify you that their account is in credit.
- Select ‘Go To Invoice And Do More’
- Add the existing payment to the invoice
- TM2 will deduct the payment from the patient's account and show the remaining credit left on the account
- When the patient books a follow up appointment TM2 will again notify you that the account is in credit and you can use an existing payment on the invoice
Advanced Prepaid Payment (Treatment Authorisation)
Steps for using Treatment Authorisation to track prepaid treatments left.
- Go to the patient's account
- Select the 'Treatment Authorisation' tab and click add
-
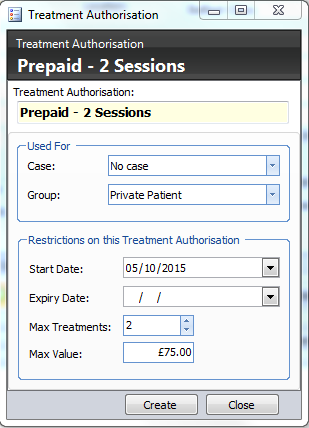
Add in the details of the number of prepaid sessions and the total amount
-
Select 'Create'
-
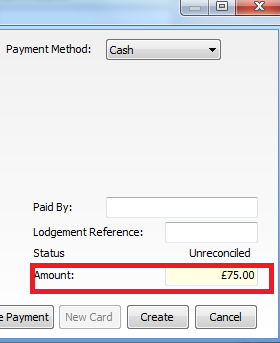
Select 'Accept Payment' in the patient account
-
Manually type in the amount the patient wishes to prepay (same amount as the treatment authorisation)
-
Click ‘Create’ to accept the payment onto the patient’s account
-
The patient's account will be in credit
-
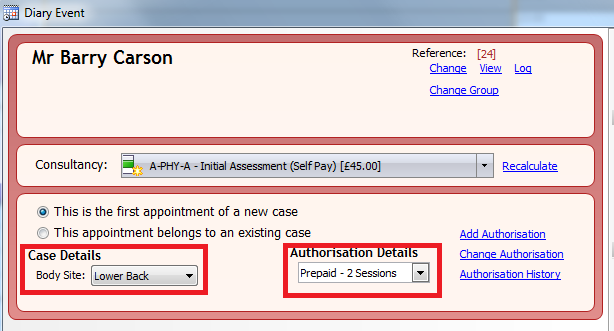
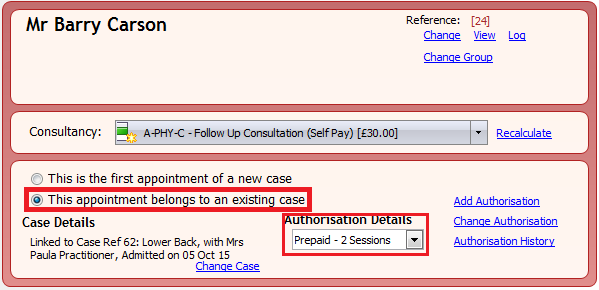
When the patient books their appointment, link it with the treatment authorisation and select a body site
-
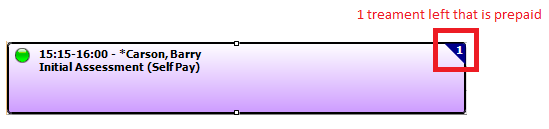
The appointment will then be booked into the diary showing there is one prepaid treatment left
-
When the appointment is completed you will be redirected to the 'TM2 Quick Bill' window
-
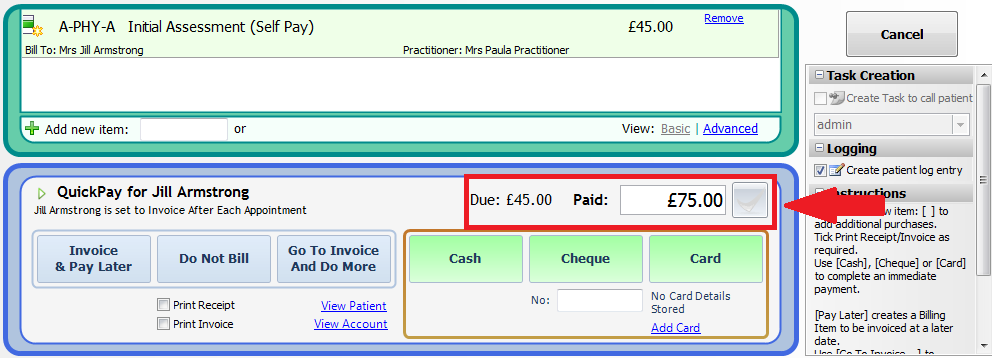
TM2 will notify you that the patient's account is in credit. Select 'Go to Invoice and Do More'
-
Select ‘Add Existing (1)’ in the payments section in the invoice window.
-
Select the payment and click 'Add Selected'
- Update the invoice and the payment is finished
-
When the patient comes in for their next appointment, book the new appointment and link it to the existing case with the treatment authorisation
-
The appointment will then be booked into the diary showing there are no prepaid treatments left

-
When the appointment is completed TM2 will again notify you that the patient's account is in credit. Select 'Go to Invoice and Do More' and add the existing payment to the invoice.
-
The payment will be added to the invoice. Update the invoice and the payment process is finished
-
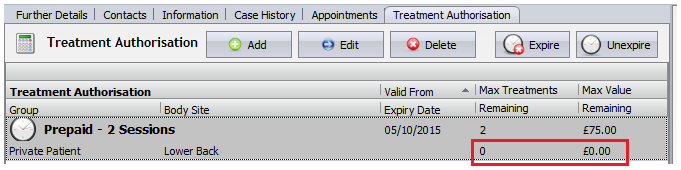
When you go back to the patient's account and select the 'Treatment Authorisation' tab there will be zero treatments left with that authorisation