Patients Overview
Note
This article relates to both the TM2 and TM3 versions of the desktop software
TM2 has many sections, one of which is the Patient section. From here patient data can be added, accessed and manipulated. Patient Search is at the top of the patient section. From here users can search for patients; to search for a patient populate one of the search boxes and press the Search button. To remove the data in the search boxes, click the Clear button.

There are different search parameters users can use:
- Reference - this is the unique number every new patient is assigned when they are added to TM2. Reference numbers are added in order i.e. the first patient added will be number 1 and the second will be 2 etc. If a user searched for reference number 11, TM2 will return all patient's reference numbers with the number 11 included in it, not just number 11. Users can order the search but this will be explained later on in this section
- Surname/Forename - these are the surname and forenames of patients. These are added into TM2 by a user/admin when setting up TM2. The same search rules apply throughout TM2 e.g. if a user adds only S into the surname search bar, TM2 will return all surnames that begin with S
- Gender - this is the gender of the patient. This is a selection box, rather than a search box. To select which gender to search for click the selection box and choose either Male or Female
- Postcode - this is the postcode of a patient. Following the same search rules users can search for a patient postcode. If only BT was typed into the search box, TM2 will return all patients with a postcode starting in BT
- Address - this is the address of a patient. The same search rules as before users can search for patient addresses. If a user searches for an address beginning with 11, TM2 will return all addresses that include the number 11
To go into more detail on searches click the two down facing arrows to the right hand side of the patient section, just under the Clear button.

When this button is pressed the More Options box will show. This includes some different search parameters than previously discussed.

The other search parameters are:
- Status - this is the current status of patients. When the selection box is clicked the following options are shown; Current, Non-Current and Deceased. If a patient has a status of Current they are going through a series of treatments in that clinic or a regular attendee at the clinic. Non-Current patients are patients who have finished their treatment and aren't scheduled to be back at the clinic. Deceased is a self explanatory term for patients
- Location - There may or may not be one or more clinic locations set up. However, if there are multiple locations the user can choose a location from the drop down box
- DOB (Date of Birth) - there are two boxes here for the DOB. This is so a user can set up a range to search for. The user can search for people who were born, for example, between 1980 and 2000. This can be done by adding 01/01/1980 to the first box and 31/12/2000
- Reg Date (Registration Date) - this will follow the same procedures as the DOB search box
- Last Appointment - this will follow the same procedures as the DOB search box
- Telephone - from here users can search for a patients telephone number. This will display the full patient record when searched for so if a user searches for a mobile number, the home phone will still be displayed on the patient record
- Email - this is used to search for patients with an email address. The email address does not need to be typed in full e.g. a user can enter @hotmail in the search box and it will return all patients with an email address that includes @hotmail
- Show Patient Grouping Box on Patient Grid - this option will hide a section underneath this window. This will be explained further in the document
To hide the More Options box click the up facing arrows on the top right of the box.

The next part to the patient window is how to sort patient records, as previously mentioned. Users can sort patients in different ways. One of which is to Drag a column header to the grey area to sort the records. Column headers are such things as name, DOB etc.

Using this method a user can add more than one search parameter, shown below. The first sort was to sort by name, in this instance there are two John Smiths so they were grouped together. However when date of birth was then dragged into the grey section the records were then further split. This type of search is useful if a user wanted to search for a number of patients in the same postcode. To remove this search drag and drop the selections anywhere below the grey space.

Another way of sorting patient details is by clicking on the column header. This will sort the details into ascending order on the first click and descending order on the next click. Using this method you can only sort one column at a time, where in the first one you could sort multiple columns. A user can tell what column(s) are being sorted by the arrow on the column header. When it is an up arrow it is sorted in ascending order and down signifies a descending order sort.
At the bottom of the Patients section there are two sections, the My Work and Calendar section. My Work allows users to add tasks and to do lists to their diary. These tasks can be related to patients or for personal use.

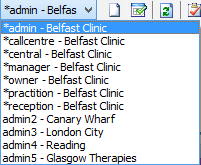
If a user is an admin, they can check the tasks other members of their practice have under their name by using the drop down selection box on the left of the My Work box, and selecting the appropriate person.
To create a new task click the New Task button.

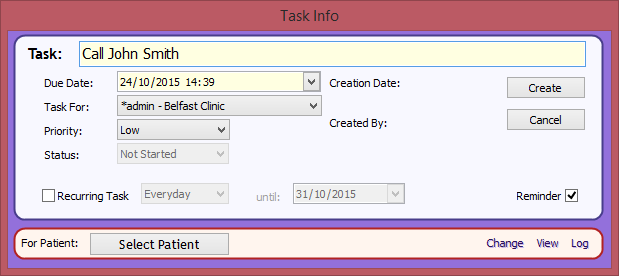
When this button is pressed the Task Info pop up box will appear. From here users can add information to the task. Users can set a due date, priority and if it is a recurring task. The Task For option is important here; if the user is the practice owner/manager they can assign tasks to other members who are set up on TM2 and this task will be shown in their My Work section. To relate a task to a patient click the Select Patient button and then choose a patient. From the Task Info box users can change the patient the task is related to, view their account or go straight to their log by clicking the corresponding button at the bottom right of the Task Info box. Creation Date and Created By will not be populated until the task is opened up again.
To add a new To Do List on the My Work section click the New To Do button.

A To Do List needs to be set up prior to this by going to Tools > To Do List Designer.
When the New To Do button is clicked this pop up window will appear. From here users can choose a previously created to do list, set the due date and who the task is assigned to. They can also select a patient, view their account or log from here also. When the Create button is clicked it will be in the My Work section of whoever the task was assigned to.

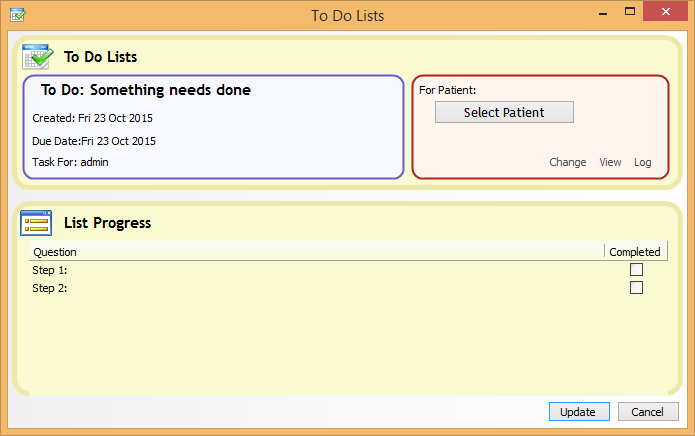
When the user double clicks the To Do List in the My Work section the pop up window below appears. From here users can add a patient, if it hasn't already been done or check off the different steps in the To Do List and update the list by clicking the Update button.
When the Refresh button is clicked it will refresh the My Work section.

The Show Completed Tasks button will show all tasks that have been previously marked as complete.

The completed tasks will be in black with a line crossed through them, as shown below.

The Show Future Tasks button will show all tasks that are due today or after. This can be useful for showing tasks that need done, if the My Work section gets messy.

The Mark as Complete button will mark any tasks as complete and remove them from the My Work section; until users press the Show Completed Tasks button to show them again.
The Tasks and To Do tick boxes show users how many tasks or to do lists are still active in their My Work section. Users can also decide if they want the tasks or to do lists showing by ticking/unticking the boxes. In the example below there is one Task and no To Do List open.

To hide the My Work box to allow more room for the diary press the Auto Hide button, located in the top right of the box.

The Calendar box in the Patients section allows users to select specific days in the Diary. The user can use the arrows on the calendar to switch forwards and backwards in months and select the appropriate date. The Auto Hide button works the same way in the Calendar as it does in the My Work section.
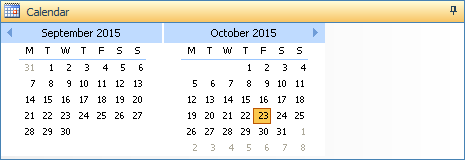
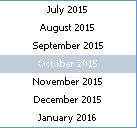
Users can click on the name of the month in at the top of the Calendar to quickly navigate through the months of that year, as shown below.
The My Work and Calendar boxes are active in all parts of TM2 unless the user closes them down.