Tools
Note
This article relates to both the TM2 and TM3 versions of the desktop software.
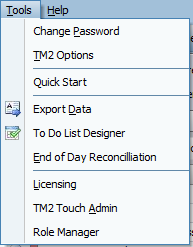
When the Tools option is clicked in TM2, the following options are displayed.
Change Password
When Change Password is clicked it will show the pop-up window below. From here you can change your own password. You will need to enter in your old password, your new password and then confirm your new password. When the strength of your password is good enough you will be able to click Ok and update your password.

TM2 Options
General Settings
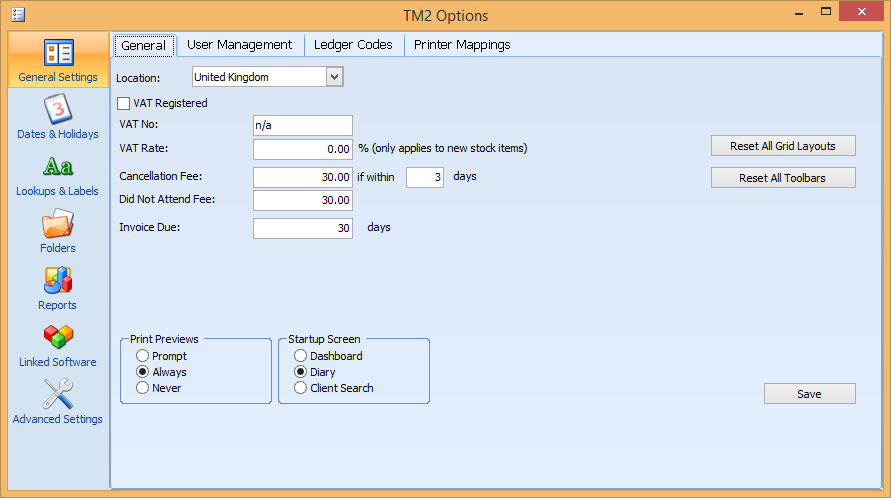
When TM2 Options is clicked it will show the pop-up window below. Many different things can be done in this section; the first option that is selected is General Settings. There are four tabs in this section but the most important tab is the General tab. Only users with admin rights can access all of the TM2 Options. From here:
- Cancelation Fee charge and the time frame can be changed
- The DNA fee can be changed here as well as the Invoice Due date
- From the right-hand side of this pop-up Grid Layouts and Toolbars can be reset
- The bottom of the pop up shows Print Preview options of Prompt, Always and Never, these can be changed to suit user needs
- Startup Screen options can be changed so you see different options when you start TM2
The User Management tab shows the different users currently signed into TM2.

If TM2 is not closed properly this can leave too many users logged on. This can cause issues within TM2 as only a certain amount of users can be logged in at any one time. Admin users can then click Force Logout on whatever user they wish to log out. Pressing Refresh will allow users to confirm if the change has been made.
See this article on information about Clearing Locks.
When the Clear Audit button is pressed the following window appears.
Start an archive of the Audit from here when it is finished it will save here C:\ProgramData\BlueZinc\TM2\logs. Please take another copy of this and store it securely.
Info
Please read this carefully, the audit tool will tell you what actions users take within TM2. These are things like updating or deleting records.

Choosing Force All Logout will log out all users.
The Ledger Codes tab shows the different Ledger Codes you can have for your clinic/practice. These are Transfer, Cancelation, DNA, Write-Off and Discount Ledgers.
The Printer Mappings tab shows what printers are mapped to TM2.
Dates & Holidays
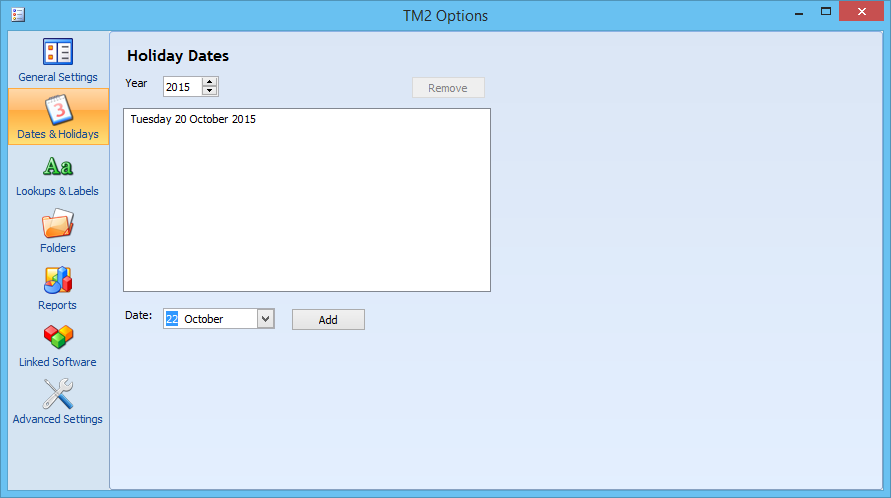
The next section in TM2 Options is Dates & Holidays, as shown below. This allows holidays to be added to the Diary. All holidays added to this section will be stored where users can keep track of them. Choose a year and then a date that needs booked and simply click Add. This will then grey out these dates on the diary and Holiday will be written beside the times on the dates selected.
Lookups and Labels
The next section in TM2 Options is Lookups & Labels. This section has different tabs some of which hold more information than others. The first one is Lookups. From here you can add and remove Lookups for different sections.
Below shows different lookups for Patient Categories. To add a new lookup, simply write a new lookup in the box on the right-hand side and click Add New Lookup. To remove a lookup click on the lookup you want to remove and then click the Remove Lookup button.

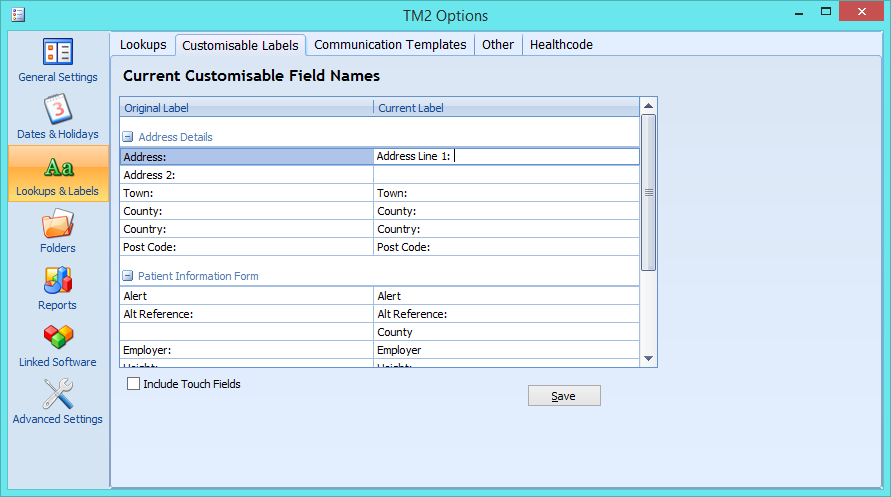
The Customisable Labels tab allows changes on the Address Details and Patient Information Form labels. To change these labels click on the field that is going to be modified, on the right-hand side. When clicked the user can delete the old label and add a new one in. Click Save to save the new label.
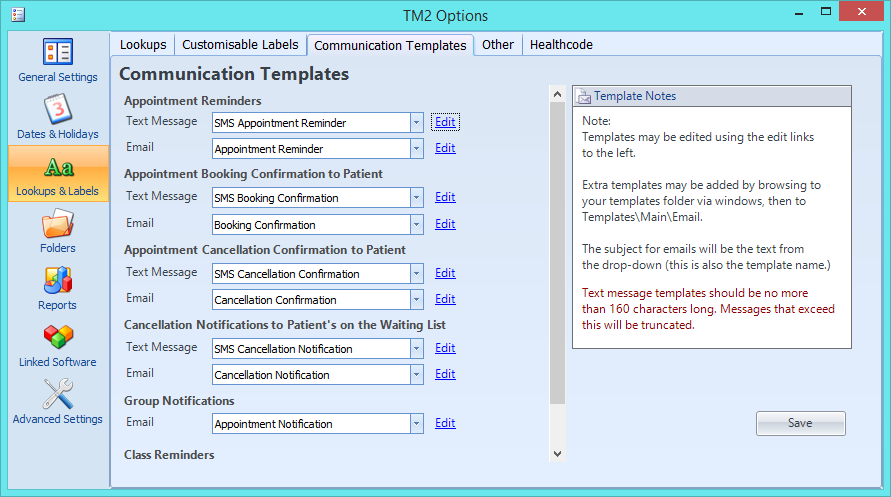
The Communication Templates tab shows the different Clinic/Practice to Patient communication methods. These communication methods can be edited to be personalised for each Clinic/Practice. Click on the Edit button beside each option to edit the template.
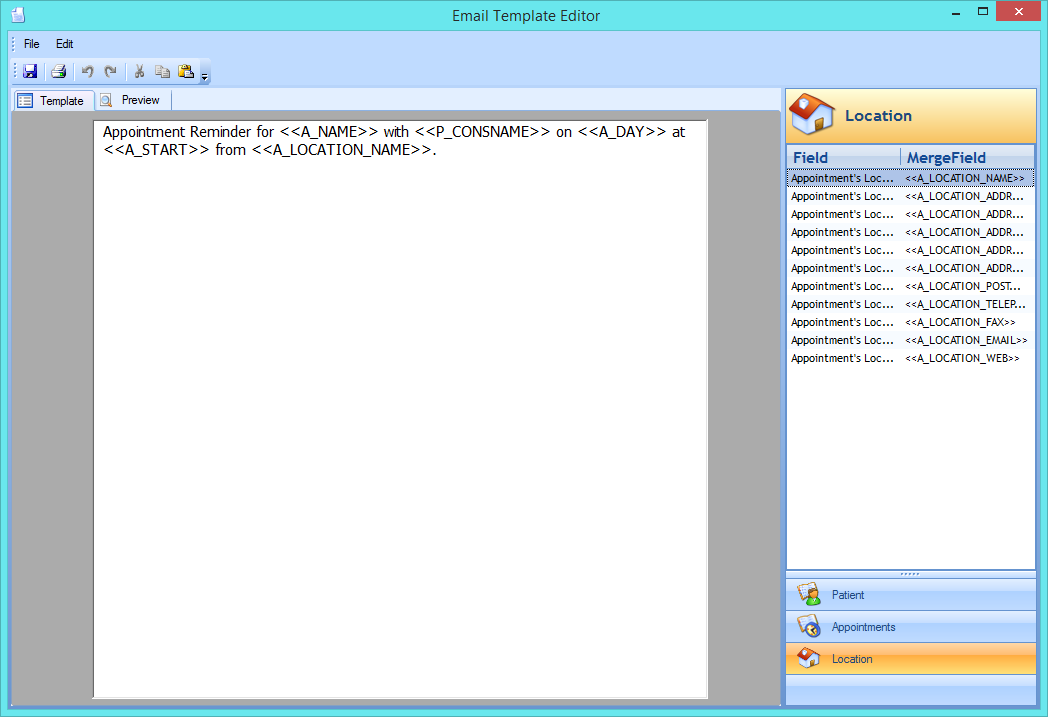
When Edit has been clicked the pop-up window below is shown. The text can be modified to suit individual Clinic/Practice needs. The fields that are brought in from the database are shown on the right-hand side of this pop-up. These can be dragged and dropped into the correct place.
The Other tab shows information on the Billing Item Transfer Text and this can be changed by editing the text in the text box and clicking Save. This is the text that will show on an invoice when a part payment is made and the remainder of the payment is transferred to either the patient or group.
The Healthcode tab is where Healthcode is set up. These fields can be populated by entering in the correct information in the corresponding fields. All details are supplied by Healthcode.
Folders
The Folders section of TM2 Options shows where the templates for letters and emails are stored. The word processor for opening letters within TM2 is set up here.
Reports
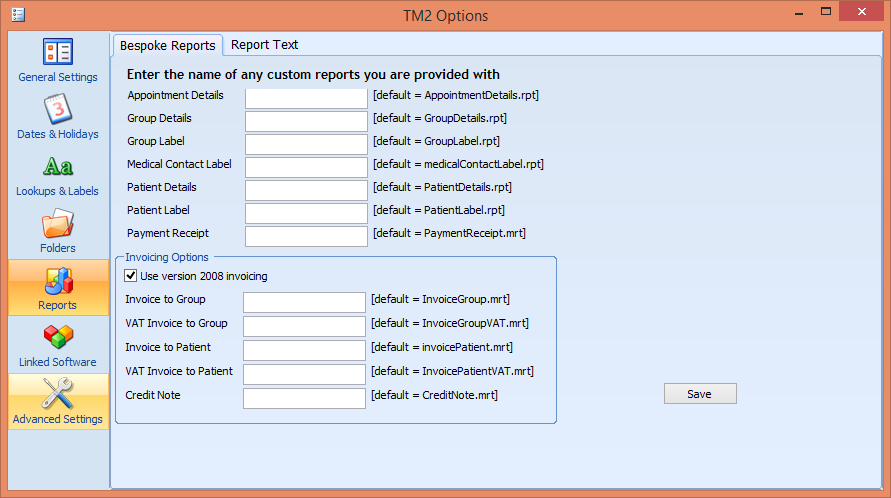
The Reports section allows editing of default report names within TM2. These fields can be populated if customer reports have been created. The file extensions (.rpt and .mrt) do not need to be added here as TM2 will add it automatically when save is clicked. In the Report Text tab, the Invoice or Statement Text can be edited by entering different text into the correct box and clicking Save.
Linked Software
The Linked Software section shows different pieces of software TM2 is compatible with. These software packages have to be enabled and users must know the corresponding information to enter before the packages are enabled within TM2.

Advanced Settings
The final part on the TM2 Options screen is the Advanced Settings section. The main tab on this section is the Configuration tab. This tab shows the configuration settings of TM2 that is installed on the local PC. These can be changed by clicking on any of the boxes on the right-hand side and choosing a different option. When any of these options are clicked a brief description appears at the bottom of the screen.
Things like setting up automatic text reminders can be activated here.

The Printer Settings Tab allows users to add new printers to TM2. From here they can also choose what printer will print different parts of TM2 e.g. Printer 1 will only print Labels and Printer 2 will print everything else.
The Internet & Email Settings tab will allow users to change the email settings of TM2 to be a manual port, rather than TM2's stock email port.
The Customer Service tab allows users to edit their security level. There is a choice of three options available. Users can also change their security word by typing into the text box and clicking save.
Quick Start
When the Quick Start option of the Tools tab has been clicked this pop-up window will appear. This option can be used at any time but is especially helpful during startup. This is a step by step guide to setting up TM2.
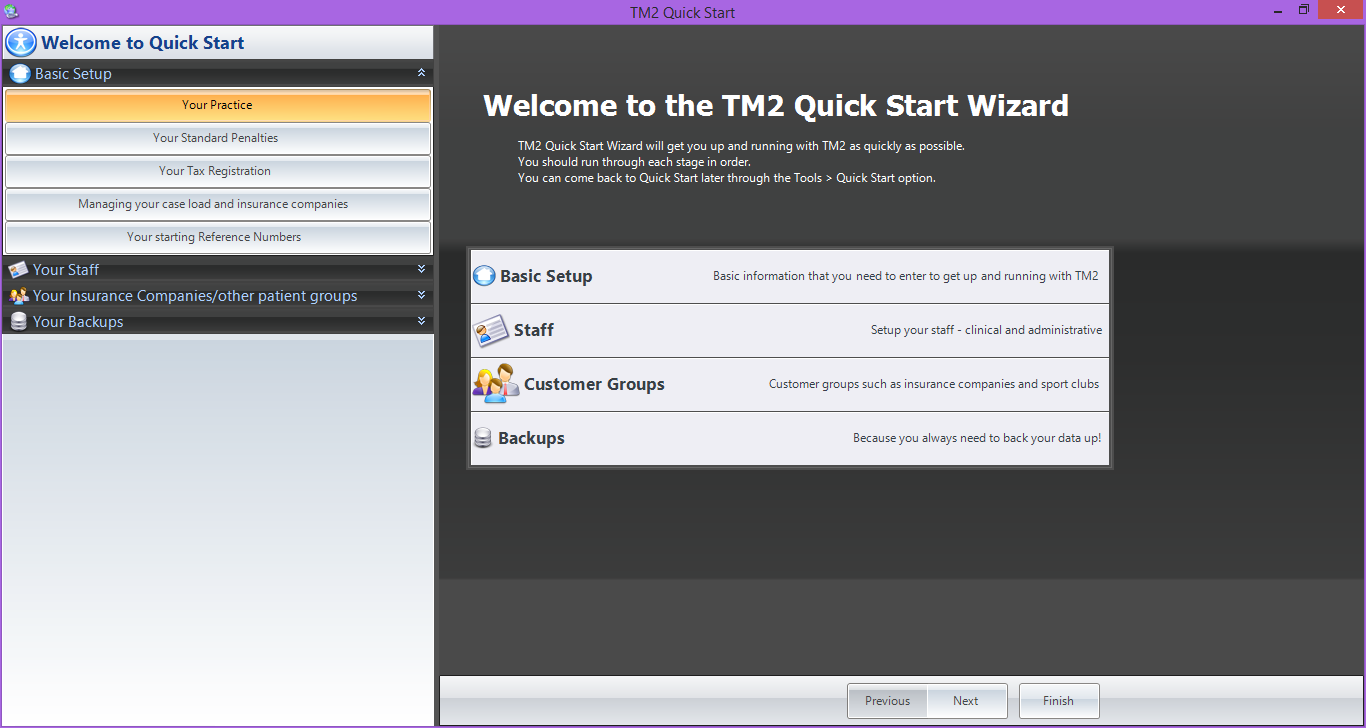
The basic setup section adds the address of the practice/clinic, the penalties for DNA and cancelations, tax registration information, whether to link different cases to each other and the different reference numbers for setting up.
The Your Staff section allows users to add new practitioners and new users to TM2 (as long as there are enough licenses for users). This can be done by clicking the add new practitioner link at the bottom of the screen. Practitioner details can be edited from here also; by clicking the Edit button.

The Your Insurance Companies section will allow users to add new insurance companies in the same way users are added. Insurance Company details can be edited here in the same way patient details are edited.

The Your Backups section allows users to choose when their data will be backed up. The location and times of the backup are chosen by the user. The email address for error messages must be entered in the appropriate field also.

Export Data
When the Export Data button is clicked TM2 will save the data the user wishes to export into a CSV file, at a location of the users choice. When Diary information is to be exported, TM2 will ask the user what practitioner information is to be exported. The user then makes a choice of practitioner and the date range of their diary they want to be exported.

When Export Data is clicked for others sections of TM2 like a patient list, users will be prompted to save the list as a .csv file. This can then be opened in Microsoft Excel or another package suitable to open .csv files and the data can then be manipulated here.
To Do List Designer
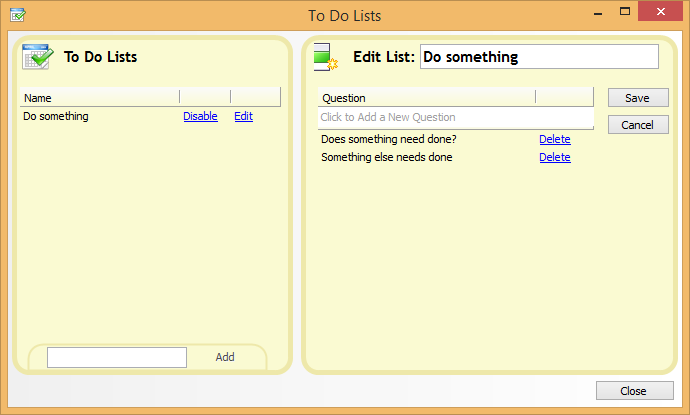
When the To Do List Designer button is clicked the pop-up window below appears. From here insert data into the text box at the bottom and click Add to create a To Do List.

When a To Do List is created click on Edit to modify the To Do List. The Edit popup is shown below. To add different steps to the list write in the Add a New Question box and click save. The steps to the lists are saved in ascending order. To delete the steps click the Delete button.
End of Day Reconciliation
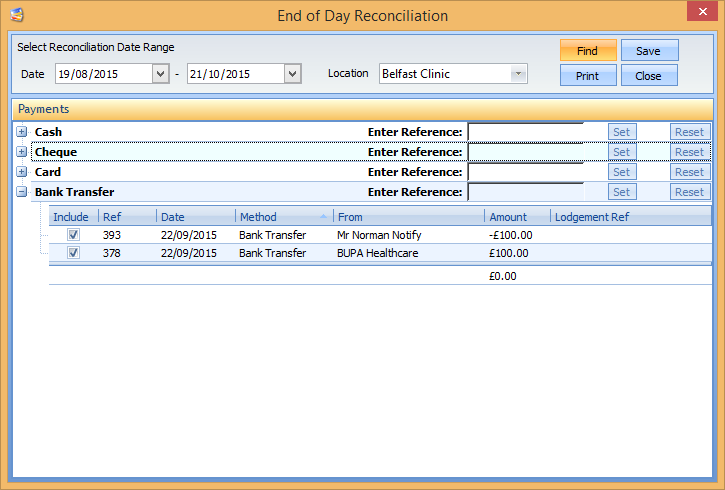
When the End of Day Reconciliation button is clicked the pop-up window below appears. The user will then choose a date range to run the report for. The date range and location is selected at the top of the pop-up. The report shows the payments made for the date range in cash, cheque, card and bank transfers. This can be saved or printed by pressing the corresponding button.
Licensing
When the Licensing button is clicked it shows details of the TM2 package purchased. The user can then update their version of TM2 from here by clicking the Update button.

TM2 Touch Admin
When the TM2 Touch Admin button is clicked the screen below is shown. This is the modalities screen, you can find more information on modalities here. When the Expand All button is pressed it will open up all the boxes in the Modalities section; the same way the Ultrasound node is expanded. The Collapse All button will bring the nodes back to their original state. Users have the option of reordering the nodes by selecting a node and either pressing the Move Node Up/Down buttons.

In this instance, the Ultrasound - Frequency node is selected. When this is double-clicked another pop-up window will appear where a user can edit the settings. Users can edit information for the node here. Users can add new modalities/nodes by right-clicking on the modalities/nodes and clicking New. The Site-Specific and General Assessments tabs follow the same procedures for editing the nodes.

The General Lookups tab allows users to add new lookups, quick picks, and images. New lookups and quick picks can be added by selecting the correct lookup/quick pick, typing in the blank box and clicking Add New Lookup/QuickPick. To remove lookups/quick picks select which one that is to be removed and click the Remove Lookup/QuickPick button.
Images can be added in this section and added to the correct Body site Chart. To add a new image for a chart click the Import button and Import the image file. To add an image to the correct Body site, open the Body site Chart using the +, select the image that is to be added and click Add. To remove an image from a Body site section click on the image and click Remove.

On the Diagnosis Code tab choose a Body Site to add a Diagnosis Code to, then enter a new Diagnosis Code into the Enter New Diagnosis Code box and click the Add Diagnosis Code button. When there is a new code added, to remove it click on the code and click the Remove Diagnosis Code button.
Role Manager
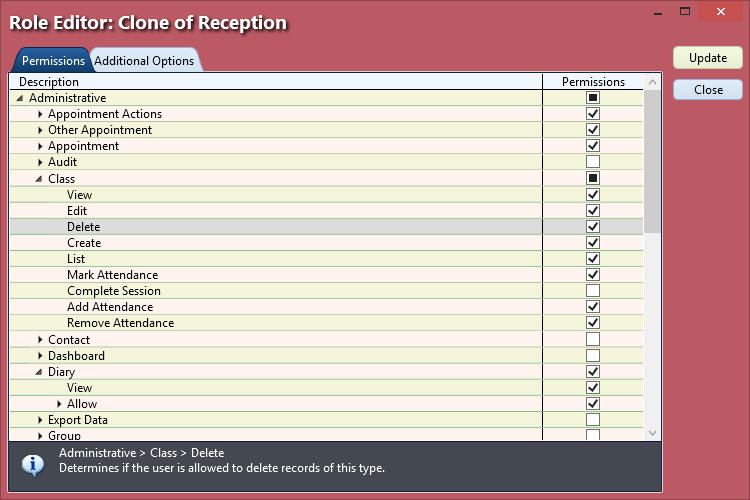
Role Manager is the final section on the tools menu bar. This section shows different user levels and their permissions. More information about the Role Manager can be found here. When the View button is clicked it will go into more detail and show exactly what each user can do. These cannot be changed as they are locked by TM2. However, users can select a section and click the Clone button, as shown by the reception section in the image below.

Clicking Edit on the Clone of Reception button opens up the window below. From here users can edit the permissions of the various options available in TM2. When all necessary changes have been made click Update and then Close to save the changes. To remove a clone click on the clone and then click the Remove button.