How to Create / Edit HTML Emails
Note
This article relates to both the TM2 and TM3 versions of the desktop software.
TM2 can send plain text and HTML emails that you can customise to suit your own design requirements. At present, the email confirmation and reminder templates are limited to plain text only (no images).
By default, the HTML emails should be enabled but you can check this as follows;
- Select Tools, TM2 Options from the top menu on TM2.
- Select Advanced Settings (only System Administrators can access this) and find the section labeled TM2 Options
- Find the option Use HTML Email and set this to True (if not already)
As with the Letters in TM2 there are various sections that you can create templates in and these areas also vary the merge fields available. For example, an email created from the Patient Letters / Email area would have details about the client but you could not reference their appointments. Similarly accessing the Letters / Email section from an appointment would grant details to the diary event but not their clinical notes.
Which area you access depends on which "Letters" button you press on the form you are currently accessing. As the examples above pressing "Letters" in a patients file would open the Patient Letters / Email area whereas pressing "Letters" from an appointment would open the Appointment Letters / Email area.
See below for respective access to these sections

Fig 1 - Patient Letters / Email area

Fig 2 - Appointment Letters / Email area
Once you have accessed the desired area you should see a screen similar to that below;

By default, the "Letters" tab is selected, to get to the Email templates simply select the "Email" tab on the left (highlighted above).
Once selected you will see the current Email templates available to that section, you will not see Appointment emails under the Patient area or vice versa.
Edit an existing template single left click on the template which will highlight the selection. Once selected press the Template Options button followed by Edit.

To create a new template select the New button from the menu shown above.
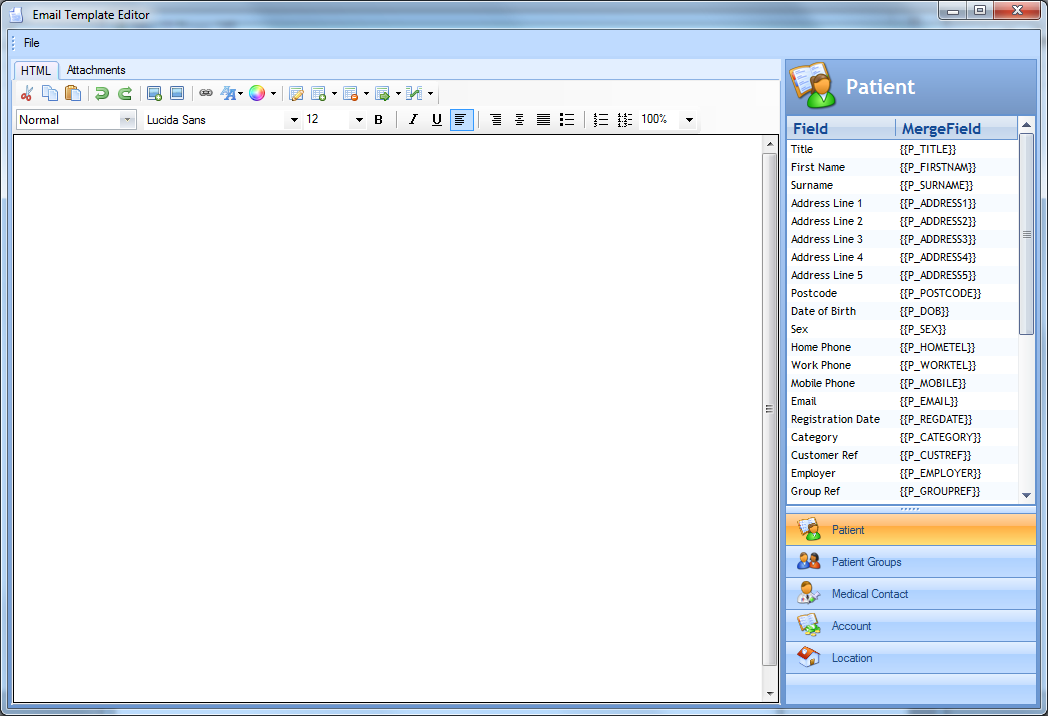
Once selected you will see a screen similar to the one below. If you selected Edit there will likely be some text/images already present, for a New selection you should see a blank page. You can make use of the various formatting/insert options using the icon along the top of the editor window, if you mouse over the icons you will see a description of what each button/icon does. The section on the right of the editor represents the merge fields available. As mentioned before these will change as per the various forums you access the letters/emails from.
You can drag these fields into the template and use as desired. The fields will be substituted with information for each client. For example;
Dear
Would show as:
Dear Mr Joe Bloggs
Dear Mrs Judith Smith
etc
Once you have finished Editing / Creating select File > Save (provide a suitable name if creating) and save the changed or created.
This template will now be available to send from the desired section.